
Video has become an intrinsic component of the internet’s enormous content mass. The content creation landscape has shifted to accommodate this relatively new form of media with an estimated 74% of internet traffic today being video traffic.
If you take Facebook, Twitter and Instagram into account, you can really see the full scale of video’s position amongst internet content.

You may be totally aware of the power of video marketing, the difficulty is, most believe that creating video is a niche skill which requires the use of professional equipment including cameras, lights and editing/production software.
We’ll show you how to create effective, impactful video content on a shoestring budget.
It’s not just about the equipment, it’s vital that you effectively use your available resources, processes and tools to create good quality video content whilst maintaining a minimal overhead.
Write the Perfect Video Script
You can’t produce a video without a script, no matter the length or purpose. A good video script provides you with a framework and sets your video content creation up for success. Take the time to answer the following key questions:
-
- What’s the goal of your video? E.g. are you advertising a product, are you increasing brand awareness?
- Who’s the audience? Are they other professionals from brands, prospective customers, existing customers? Also, are they old or young? Technical or creatives? Millennials or senior professionals, etc.
- What key points do you want the audience to remember? Are you looking for sales, leads or awareness?
Additionally, it’s important to consider the length of your video. Whilst research from Wistia shows that 2 minutes is a sweet spot for holding viewer engagement, longer formats are fine if they are needed. More importantly, regardless of the length of the video, simply summarize your core message within the first 30 seconds to secure viewer engagement.
Effectively Communicate with your Audience
The tone of your script also influences the delivery of your message and it should match up with your goals. In 1967, linguist Albert Mehrabian invented the “7%-38%-55%” rule for communication.

He suggested that communication was composed of 3 different core elements:
- Your choice of words (7%).
- The tone in which you deliver them (38%).
- Body language (55%).
Unless you’re filming yourself or another human in full then you can discount body language but otherwise, it’s clearly the most important factor to bring into account when filming your video.
Script Writing: Tone
The tone of your video script is determined by your message’s emotionality and language choice. Broadly speaking, writing tone is either formal or informal.
Your script’s tone needs to resonate with your target audience. If your brand is formal, perhaps high-end, or in a sector such as finance, then it’s more than likely that you’ll need to adopt a professional tone. For informal brands working within creative sectors, opting for a casual tone should help your script to be appropriately tailored for your audience.
Writing tone is shaped by word choice and placement. Longer and more syllabic words can create a more professional tone whereas increased use of colloquial language creates a more casual tone.

If you’re confused about how to make your script either more or less formal, see the following examples:
Voice Examples
Formal: Many established businesses may not be aware of the challenges that face modern startups.
Informal: Many established businesses haven’t a clue of the challenges that face modern startups!
Formal: For maximum marketing efficiency, orientate your business around video.
Informal: To improve your marketing efforts, simply use more video.
Adequately Prepare For Your Video Production Shoot
The saying rings true in videography the same as in almost anything; if you fail to plan then you plan to fail, so prepare to be efficient on the day of your shoot. Easily plan for it by viewing Studiobinder’s essential pre-production checklist, it’s packed full of actionable tips that’ll ensure you remember everything on the day.
Choose Your Location Wisely
Make sensible choices for location. It’s far from ideal filming a professional-style marketing video in a parking lot or park, nor do you want to choose a location which is full of background noise or other interferences. You can prepare everything from cast to script and equipment to the very best of your ability but if you lack an optimum location for your video then your hard work will be wasted.
Here’s a list of questions to remember whilst you’re scouting to find and secure an optimal film location:
Have you seen what the location is like during the time of day that you’ll be filming?
Scouting your ideal location is incredibly important, you should take all of the people that’ll be involved in your video to the location so that you can experience what a day of shooting might feel like. A location could have beautiful scenery but there might be insufficient space to place a tripod. Visiting your location before filming empowers you to carefully select places that are suitable in terms of:
- Space
- Scenery
- Lighting
How accessible is the location? How easy is it travel to the location?
It’s good to pick a location that all of the members of your team can travel to, so that you spend more time on the set, less time on travel and ultimately more time for editing and post-production.
Are there ambient sounds that might cause problems with the filming?
This means any sound ranging from people to cars or machines – you can’t just turn off these ambient backgrounds during post-production (they may indeed become amplified when you process your audio tracks). However, there are preventative techniques that you can use such as a wind muffle for your microphone.
Is there adequate space for the camera crew?
You’ll need adequate space both behind and in front of the camera. Cramped rooms and outdoor spaces may encroach on your filming space. Shadows cast by those behind the camera are also a frequent issue in small rooms.
Will the location be available again for several retakes?
You might spend several days filming in a single location so make sure that the location is available for as long as you need it.
How much control do you have over the filming space?
What aspects of the space can you control? This includes lightning, rearranging the space, setting up props and decorations, etc. The greater control you have of all of the variables of your space, the better it is!
Here’s an overview of some popular film shoot locations:
Office Locations
The office background is typical for many business videos but you can’t just set-up and film in your own office, you have to be aware of environmental and background noise, poor lighting and echoes. Some videos show people apparently going about their working day in the background, creating a sense of life and energy to the video.
Offices tend to be noisy and therein lies their biggest downside, here are some typical noises to listen out for:
- Computer fans.
- Air-con.
- Distant sounds from other rooms.
Outside Locations
Filming outside has its benefits. You have a naturally interactive background, natural lighting and room to manoeuvre. You’re also likely to encounter wind and environmental sounds like birdsong, which isn’t the end of the world so long as it remains low volume. In contrast, the wind will destroy your recordings so pick the stillest day possible and invest in a wind guard for your microphone.
Also, whilst natural light seems great, it’s subject to change throughout the course of your video and whilst direct sunlight can provide an attractive level of warm light, any cloud can quickly turn your video sterile and flat.
Location Scouting Tools

We’ve compiled a list of tools to help with your search for the perfect location, every tool provides you with an abundance of potential filming locations that vary in location type and rental prices.
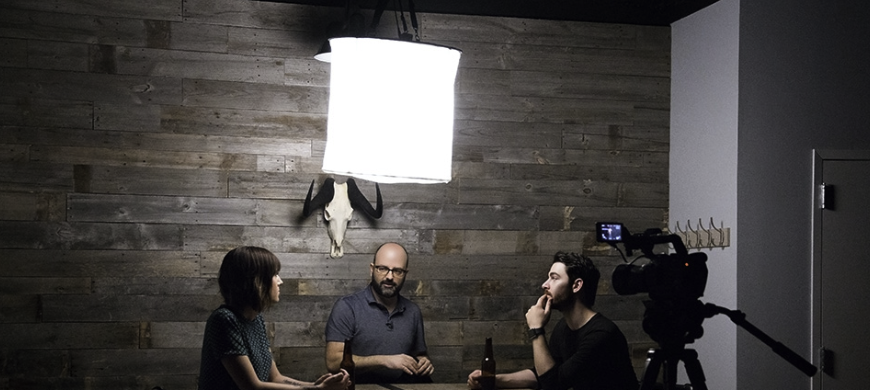
Studio Locations
Many videos are shot in studios. Shooting in a studio means you have optimum control over lightning, audio, setup and environment. Although renting a recording studio is expensive you can create your own DIY studio space on a shoestring budget:
Setting Up a Budget Studio Location
Setting up a studio will give you control over two filming fundamentals:
- Lighting and image
- Sound
Background
In a studio location, you can control your background by either creating a set from a few props or using a green screen. For budget videos, grey fabric makes an excellent neutral background (make sure there are no creases). Whiteboards are still perfectly fine, as indicated by these style videos from Moz.
Another key point to background is focus. You want your video’s focal point to be placed firmly over your subject. If your background isn’t important then you can blur it by adjusting your camera’s aperture.
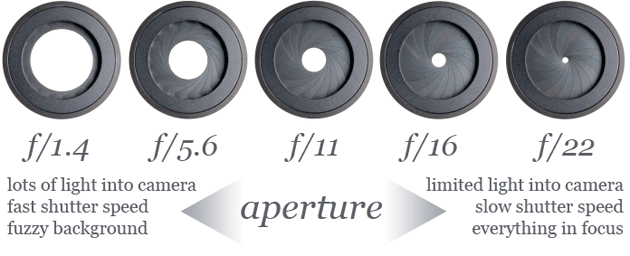
As you can see, a low aperture (and thus wider hole), is suitable if you want to obscure your background and focus on a closer subject. If you want to capture a wider shot with greater depth of field, meaning everything is in focus, then use a higher aperture.
Most cameras will allow you to adjust aperture whilst keeping shutter speed automatic. A higher aperture means a much slower shutter speed, allowing more light to the sensor.
Simply adjust the aperture and the camera will provide an appropriate shutter speed. Slower shutter speeds make camera shake more likely which brings us onto an essential item that you must prepare pre-shoot.
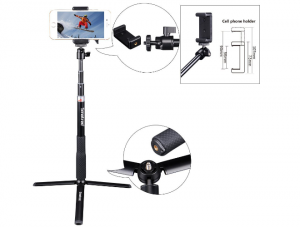
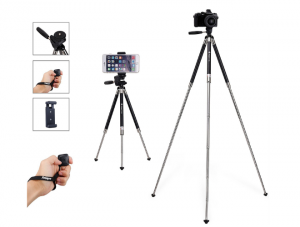
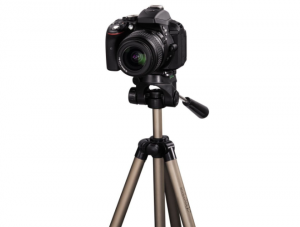
Tripod
Whether you’re filming with a dSLR, video camera or smartphone, tripods are essential. Removing wobbly footage from your filming enhances the quality of your video. Tripods are inexpensive so make sure to add one to your filming arsenal.
If you don’t own a tripod then here are 3 suggestions for various cameras:
Lighting
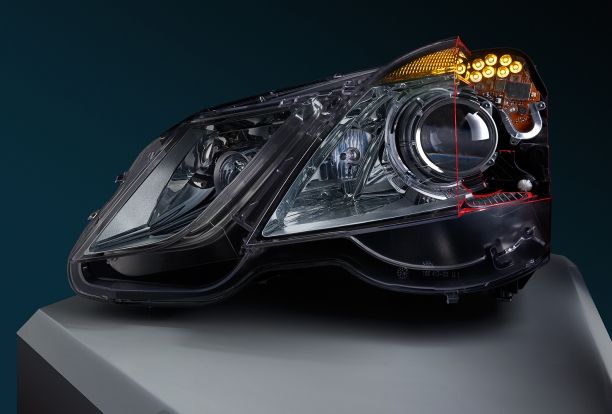
Your lighting will alter your white balance settings and thus, it has to work in tandem with your background.

The above image shows how excessive blue light can fundamentally alter the colour of your image. Set the white balance incorrectly and your video will look washed out and sterile. Most cameras are able to automatically set white balance pretty effectively but it’s always worth experimenting with manual settings.
Whilst there are various methods for setting white balance whereby someone holds a piece of grey card in front of the camera lens, it’s probably best to just scroll through the settings until you notice when the colours start to become deeper, more vibrant and realistic.
Lighting your subjects properly will give your film a professional edge over those which are simply shot in environmental light.
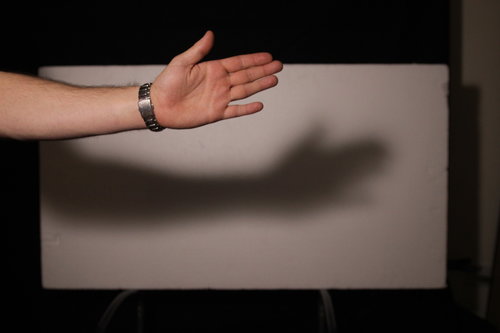
Soft light vs Hard Light
Hard lighting is caused by direct lighting of a subject against a plain background. Hard lighting causes sharp shadows which are often unflattering. They can be quite dramatic in the right circumstances but in general, soft lighting is easier on the eye.
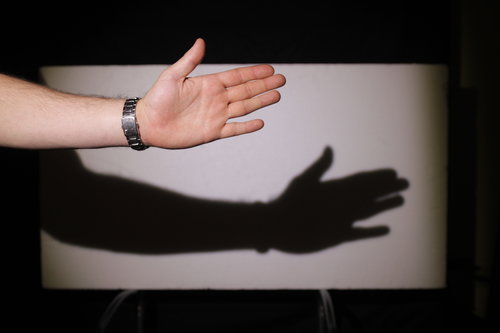
Soft Lightning reduces contrasts and therefore offers soft shadows. This generally makes subjects look flatter, softer and easier on the eye.
DIY Solution: China Ball
The inexpensive china ball lamp shade can create a beautifully soft diffuse light source that offers appealingly low contrast and soft shadows.
Warm Light vs Cold Light
As mentioned, the white balance of light greatly affects the warmth and colour of a shot and its subjects. Think of extremely white LEDs – they’re very bright but are hardly visually pleasing for your eyes.
Now think of the warm, comforting light produced by a candle.
There’s an extremely large difference between the two and despite both being forms of ‘white light’, they have wildly different creative uses. 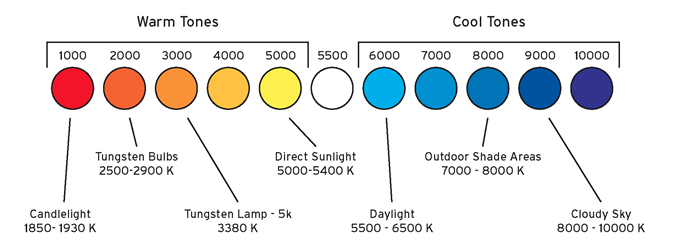
Tungsten Glow
Candle light produces a wonderfully warm glow but it isn’t very bright! Tungsten is used as a filament in many bulbs due to its resilience and incredibly high melting point. It also produces a highly-sought after rich orange light which is also bright enough to light subjects. Tungsten lights used in video are often referred to as ‘redheads’ and budget versions are available for around £100 a pair.
DIY Solution: Halogen Work Light
A cheap alternative ‘industry secret’ is the halogen work light, available from DIY stores like B&Q for <£20.
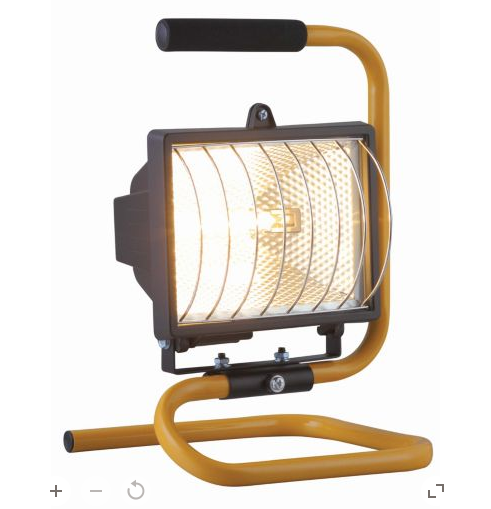
These are bright but also offer that sought-after warm coloured light.
When to Use Hard or Cold Light?
Hard and cold lighting has its uses. Car and tech manufacturers regularly increase their colour contrasts, shadows and blue light to create an ultra-cool aesthetic to their product photography and video.
Camera Positioning
The way you position your camera crucially helps you illustrate the visual narrative of your video. Camera positioning ‘language’ is used throughout films and media to help tell a story.
Pointing a camera slightly up from below the subject generally makes the subject look bigger. This insinuates greater strength, courage and authority. With the subject facing the camera, this is the angle you’ll want to use for most interview style videos.
Contrastingly, high angle shots make the subject seem smaller or shorter. These are still useful for providing a description of the subject’s surrounding environment.

Front-facing shots where the subject is squared in the middle are the most engaging and personal. You could use this shot to directly engage someone with an important shot. Charity adverts often use this angle.
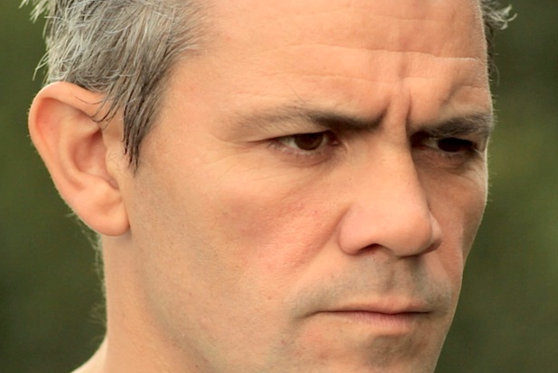
The side view places us more as an observer rather than directly engaging us with the subject. You could use this to overviewing someone’s working process.
The Rule of Thirds
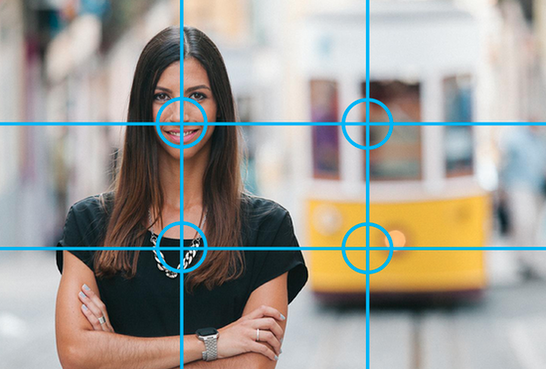
The rule of thirds has been used as a compositional guideline for painting, video and photography for centuries. Whilst there are many idiosyncrasies to the rule of thirds, research generally aligns to the fact that many of us tend to gravitate to the top left corner of an image.
Pulling Everything Together on the Day
Overview your script with all those involved in your film
Make sure that everyone understands the video goals and script, however we recommend that you avoid telling your actors or subjects that they need to memorize the script word by word as this will help you to reduce actor nervousness whilst filming.
Start with your set. Form your set and take into account your lighting situation. If you’re not using a lightning rig and are filming inside then use natural light to your advantage. Position yourself near a large window or glass door but be careful of glare entering the camera or subject’s eyes.
Adjust camera position and white balance
These elements are fundamental to capturing quality video. Adjust your camera’s white balance manually if you feel that your image is too washed out. If you have time, film a test video and check the white balance on a pc monitor. Then, pick a camera position for each shot, for example a low-angle shot for an interview.
Errors that aren’t obvious on the day can cripple your entire video in the foot on the day of editing. Check your camera settings over and make sure of the following:
- You’re shooting in the highest resolution possible (720p is the minimum these days).
- Your audio is set to a format and sample/bit-rate that is friendly with your editing software. If you’re unsure then always use 16/24-bit/44.1 kHz.
- Your audio gain is set to a healthy level where the loudest sounds in your video sit just above the green zone with no-redlining or clipping.

- Ensure that you have sufficient space on your memory card and that your memory card has a high enough write-speed to cope with HD filming.
- A clean lens.
- That no annoying sounds are audible through your camera’s microphone (connect some headphones and crank your mic gain to find out any nuisance sounds).
Get the camera rolling and film your first few shots. Multiple takes are never a bad thing as they’ll give you more content that you can use for the editing phase of your video. At the same time carefully pick your re-takes and don’t overload your video or your subjects.
Conclusion
Creating video doesn’t need the service of top-end cameras and accessories. It’s possible to make high-quality videos with a decent camera, several smart DIY hacks that are accompanied with some basic film knowledge.
Simply keep in mind the key principles of videography, such as camera positioning, composition, lighting and format, then you’ll be able to produce video far beyond the quality in comparison to if you just rushed into recording without planning.
Once you’ve created a couple of great videos, it’ll become second nature to plan out videos alongside your existing marketing campaigns.